How to use the diagramRead the visual first, then connect each label to the lesson text and your calculator inputs. The aim is to make every assumption visible before you calculate.
Learning Objective
Create practical documentation for sealing compliance.
Specification notes
Sealing products and workmanship expectations should be written into the specification.
Inspection records
Photos and checklists help prove that sealing details were implemented.
Practice Task
Draft a sealing checklist.
Assign inspection stages.
Calculator Tip
Use comments to flag details that cannot be verified from drawings alone.
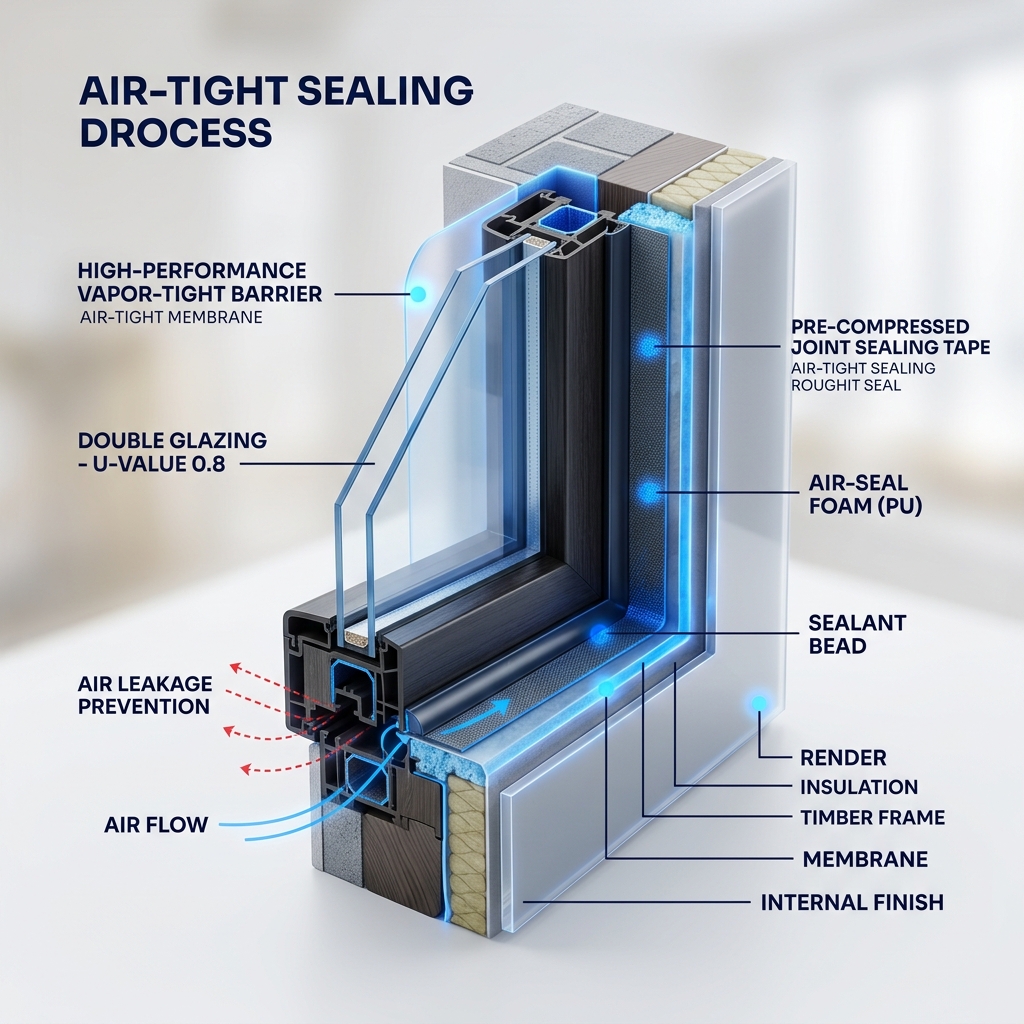
Worked Example: Leakage Path Review
Scenario
A section shows window frames, roof penetrations and external wall junctions but no sealing notes.
Calculator Entry
Use comments or report notes to flag sealing details that need confirmation.
Step-by-step method
1Mark likely leakage paths on the drawing.
2Add sealing products or workmanship notes to the specification.
3Identify inspection points during construction.
4Keep photo or checklist evidence with the project record.
Expected conclusion
Sealing compliance depends on continuous detailing and site evidence, not one isolated product.
Common Mistakes
Treating air sealing as a product choice only, instead of a continuous envelope detail.
Missing joints around windows, doors and service penetrations.
Failing to plan site inspection evidence for sealing work.
Quick Knowledge Check
1. What should you confirm before applying this lesson to a project?
Specification exists.
2. Which piece of evidence should support the main input in this lesson?
Draft a sealing checklist.
3. What is the safest action if the information is incomplete?
Flag the missing evidence, use a conservative assumption where appropriate, and avoid claiming compliance until the information is confirmed.